
After a long cold Michigan winter, and a near-miss with a propane heater in my garage, it feels great to be working outside again this summer! The air is cool, the sun is shining and I'm much more inspired to be transforming time-worn pieces in these conditions!
That being said, I've been busy saying 'yes' to your painting requests when I'm available. My friend Cherie brought this piece over last week for me to paint. It's for her daughter, Kylie's bedroom in her new college townhouse.
She showed me the print and colors from Kylie's duvet and asked me to choose a paint that was a few shades lighter than the teal in the sham. Here are the colors in the bedding:

Here's the instagram pic I posted of the before/after:
(Shameless plug- if you're not following me on insta...it's "room4change_")
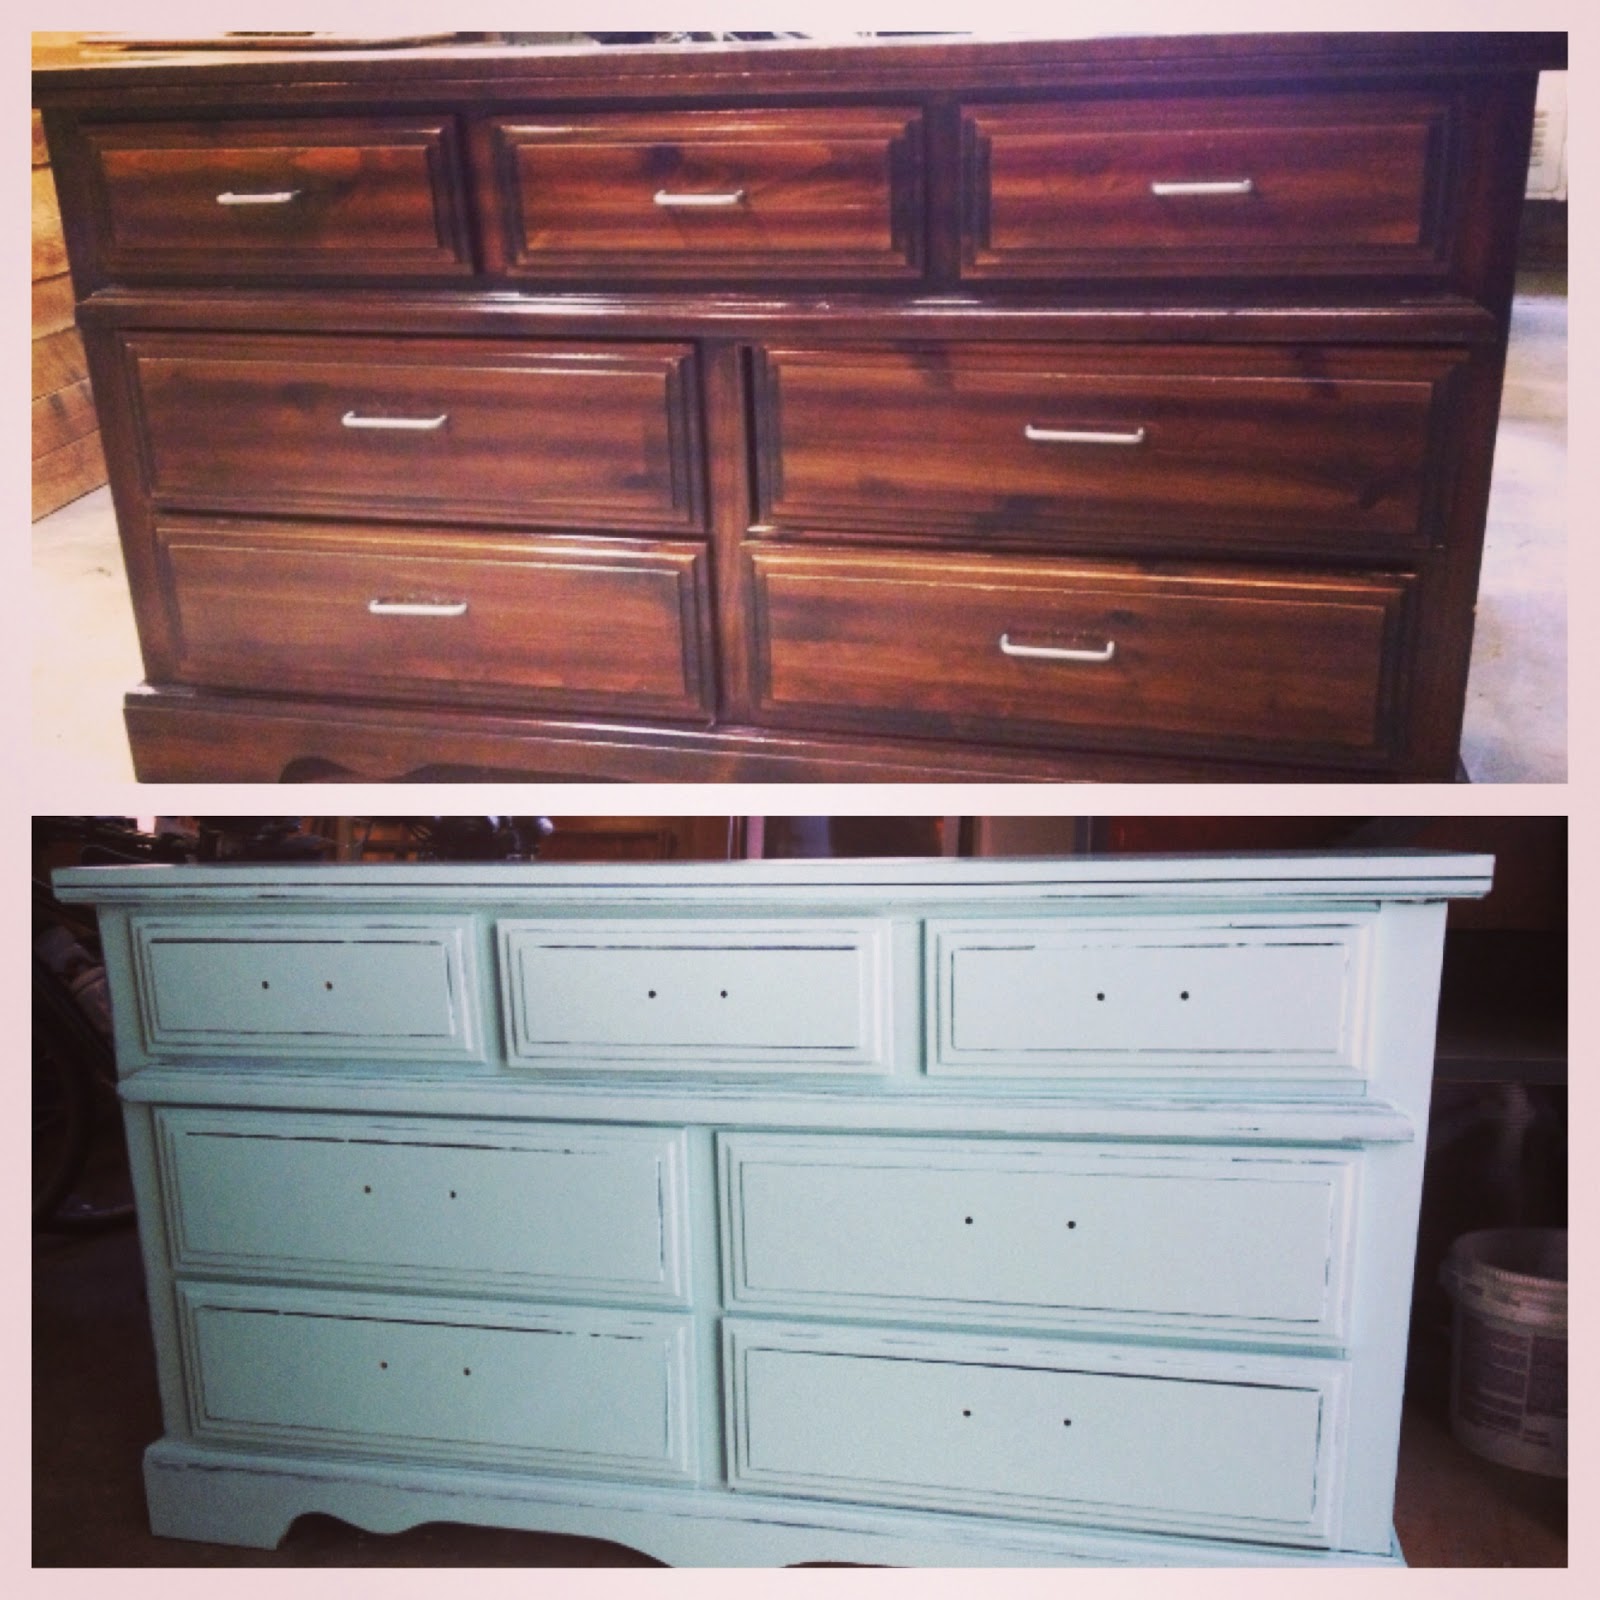
Here is the piece with hardware still on:


She thought the top of the dresser was laminate, but after I got to work sanding it, I realized that it was actually wood but just really heavily lacquered. My orbital sander has never worked so hard.

Here's me and my granny hands washing off the surface with a warm damp rag to remove all the dust and debris.

I always use a soft bristled paint brush to cover the edges and beveled details of a piece. This pic shows the 'cutting in' that's necessary with the stain blocking primer.

I'm never a fan of seeing brush strokes on a piece unless it's super cottage-y and that's the look you're after. Once the edges are cut in, I quickly roll out the brush lines with a white foam roller.

Here's a pic after two coats of primer:

You can usually tell a big difference with coverage after the second coat of primer is applied. Especially on a dark piece like this. I always put two coats of primer on, sometimes three if the furniture veneer is bleeding through.


Cherie's friend Stacie was boating with her the weekend she picked up the furniture (above) and since their daughters are rooming together their freshman year of college, Stacie and her daughter Hannah thought it would be nice to breathe new life into this dining set for their new apartment for the girls to share.
Here are the traditional chairs (set of four):


Here are the legs-super glossy and spindly-another painter's nightmare. :)


First step after sanding and washing, was taping off the stripes. I measured it all out and determined 5 inch stripes made the most sense. The black Ben Moore paint I use has a self-primer in it so it saved me a step there-thank goodness, 'cause this was time consuming!


The one on the left is washed with the stain.


Thanks for sitting through my brief and sketchy painting tutorial. I am hoping to get some time after a camping vacation scheduled soon to work on some of my own projects to showcase in downtown Zeeland's Fall Peddler's Market! We had such a blast at the Spring Market, and I so thrilled to have applied and was asked back to this one-so save the date! It will be worth your while to swing through Main Street on Sept. 6! I'll be sure to post what I'll be peddling on Instagram, FB and here. Thanks for following! See ya back here before I leave on vacay!


Post a Comment