Tuesday, August 31, 2010

I had a dream...

That money talks
I'll not deny
I heard it once:
It said "Goodbye."
My husband and I once had a dream of owning a cottage someday. It would be in a quaint small town, not neccessarily on the water, but near it.  The town would be filled with amazing, creative people, and most everything we needed for a relaxing summer and life would be within walking distance.  We would feel refreshed and rejuvinated being there, and would spend time sitting on our porch, sipping cappucinos and chatting with our interesting, friendly neighbors. Our kids would be able to bike where they wanted, and on weekend mornings, we would walk for pastries and buy produce at a local farmer's market. We would be able to invite friends to this place, and grill out and and catch up on life. When we were there, we would breathe a little easier and laugh a little louder.  This was our dream...

And it dawned on me just this summer, that we are already living it.  It's not a cottage, but it's our home that we bought three years ago downtown Zeeland.  All of the things I've always wanted in a cottage, I already have right here with me, every day. 
I get to enjoy cottage style living every day, without the monthly mortgage and upkeep of owning another home.
But, in another life, if I ever won the lottery, here are a few cottage homes that I might choose.
A girl can dream, can't she?


  Enjoy this virtual parade of cottage style homes, taken in our favorite vacation spot, Pentwater, Mi... 


In reality, this is my cottage...

And I wouldn't change a thing!


"Command those who are rich in this present world, not to be arrogant nor to put their hope in wealth, which is so uncertain, but to put their hope in God, who richly provides us with everything for our enjoyment."
1 Timothy 6:17
Pentwater "Cottage" Memories 2010

Comments...

Thursday, August 26, 2010

The Burning Ring of Fire

A tribute to the great Johnny Cash and my 40th "White Hot" Suprise birthday bash two years ago. 
I painted this quote on our family room wall after watching an incriminating DVD that my brother-n-law made in honor of the night.  Let's just say it involved a thunderstorm, lots of dirty white linens and the guest of honor almost literally falling into a burning ring of fire.  Two years later and a bit older and wiser (I pray), and I thought it was time to retire the phrase.  Both my kids were thrilled to help me with this painting project.  The first step was covering over the lettering with the brown paint.


I have been wanting to lighten and brighten this wall for quite some time now.  Our family room is an impossible room to furnish.  We have a coatrack wall that acts as a mudroom, a pennisula with four barstools on the adjacent wall, two doors, (one closet and one bathroom) two windows and a large sliding door.  It's also very narrow with low ceilings.  I've tried many different configurations and finally settled on one that works, but the back wall was still drab and depressing.  I had purchased a stencil a while ago from Designer Stencils online for a client but we never used it.  I thought this wall might be a good application for it. 

I started by buying the creamy white trim paint that I had used in the family room.  I was going to leave the brown base color and stencil over it with white.  I knew I'd need some spray adhesive to hold the stencil template to the wall while I painted.


Here is the stencil that I bought online for $30.00. I was a little stumped as to why the outside edges weren't cut in the shape of the design but it's so NOT like me to think something through to the end, so away we went.
Here's Kennedy spraying the back of the template with the adhesive. For a temporary hold, you spray it on and let it sit for a couple of minutes.  This worked beautifully to hold the stencil to the wall for at least three paint applications. 
.
I rolled the white paint on with a foam rollar. I use these things for just about everything.  This part was easy and fun, but I quickly realized that I shouldn't have removed the stencil until after the paint dried. It would need another coat.  I grabbed a fan to speed up the process.  This might take all day!
And, here's the image that it produced.  Notice the outside edges that remained brown.  I didn't think anything of it yet at this point.

Look closely at the brown in between.  This is where I should have overlapped the template so that no brown paint showed through at all.  I still wasn't convinced that this was a problem.

As you can see, it was starting to look like a pattern.  I wasn't loving the brown shapes but at least it was looking uniform.  Well, my darling husband came home for lunch and asked about the brown.  That confirmed it.  I had applied it incorrectly....but I knew it could be salvaged.  See the picture below to look at how I started overlapping the edge. The top row was done the correct way.
And I continued...keep in mind that each square took about 6 minutes for 2 coats plus time to spray the template every so often.  My patience was running thin.
And here is the mess that it looked like at 5:00 PM. I had been working since 11:30 AM.  I stepped back and freaked!!  Arrrgggghhhh!  It looked horrendous!  Look at the middle of the wall...smack dab in the middle where I started correcting the mistake!  I packed up the ladder, put away the paint and pouted my way through dinner. I seriously thought I'd be repainting the wall the next day.  What a waste of a day.

Kennedy and Brecken to the rescue.  Kennedy kept repeating, "Mom, patience, patience, Mom" like a mantra.  It was just what I needed to regroup.  We eached grabbed an artist's brush and went to work fixing up the thin lines and rebrushing the mistakes. 
I have to say that this was the best part of the project...working together and seeing instant results. Very rewarding and humbling, (that my daughter once again assumed the role of mentor).  I'm so blessed.
You can see that it's certainly not perfect, but all of us love what it did for the room. It's so much brighter in here and because it was a group effort, the girls are so proud of what we accomplished together.  In a perfect world, there would be a modern pear colored sectional in that corner of the wall with really crisp accent pillows but for now I like the change.  Proof once again that a little change ($65 to be exact), goes a long way!

Comments...

Monday, August 23, 2010

Sunsets, Summer and Stuff

We took this picture overlooking Lake Michigan just south of Ludington.  We have been having fun making new camping memories this summer with my extended family at our favorite State Park in Pentwater.  Hope you've had some spectacular sunset sightings as well.  I'm sad to see summer come to an end.

I bought this bookcase at Allegan Antiques last month.  It's a little crooked, but it adds to the charm! I debated about what color scheme to do. I wanted to do a bright teal, but I knew I would be bringing it to the store to sell, and that limits who's buying it, so I opted for something a little more timeless.

I wallpapered the back of it with wrapping paper!!!  I bought the paper last year..it was marked way down. It actually has a raised fabric feel to it, so it really looks like wallpaper.  What a cheap option.  I used decoupage medium to adhere it.  It's in my booth at "Not So Shabby" right now..(unless it sold last week while I was gone). 
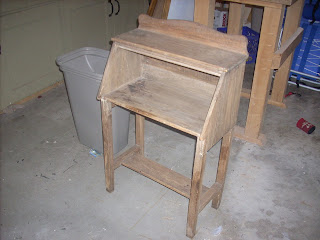
This cute little table I also purchased at the Allegan Antiques show.  I loved how small and simple it was. I was tempted to keep it for my family room, but wanted to paint it orange and that wouldn't work in my room.
I used a burnt orange and glazed it to look aged with dark brown Bri-wax.
Couldn't resist showing off my youngest daughter "Brecken" who loves to help mom prep pieces and even paint once and a while. I usually pay her, but this day she was working for 'free'. 

Our barn cat, Esker even helps out with 'quality control' in my business. I made this ottoman for a client, (tufted buttons were added later), and Esker approves. Rest assured, not all items come with cat hair.

This pic. is for my sister Howard...proof that I actually did wakeboard this summer.  Still paying for it literally with physical therapy, but so worth the bragging rights with my nephews.

Comments...

Saturday, August 14, 2010

Deja Vu?

.  I've often said my favorite thing about this job is meeting amazing people and this project was no exception. This is the second time I've decorated this house. The first time around was a parade home in 2008. This client liked the floor plan and built virtually the same house, so I knew it like the back of my hand. I always looked forward to my appointments with Lindsey and we were 'on the same page' with just about everything that went into this house.  She was willing and ready to take risks and I had so much fun  trying to pretend that I was as stylish and trendy as she is!


This wallpaper in the half bath was the inspiration for all the colors in the house.  She had found a picture of a swatch of it in a magazine and we thought it was a rug...so we planned her whole sunporch around it. When we discovered it was actually wallcovering, we ordered it for the bath and ran with the same retro theme and color scheme throughout the rest of the house.

We luckily found a rug for the sunroom that we liked as much as the original idea. Found this at Pottery Barn.
I thought the antique dolly cart would be a great addition to the room and she found a guy in Allegan that refinishes them beautifully! 

The original parade home that I did was much more rustic in nature and we incorporated some of that with the wood tones in this house as well. 

The focal point in the kitchen is this arched brick wall.  So pretty. 


We both fell in love with the 'lines' of this funky furniture.  Notice how high the backs of the pieces are. I think they fill the great room nicely.  We pulled in more greens and browns in this area to lighten things up.  I used a lot of Benjamin Moore's new Aura Paint colors in this house. 


Our very favorite room in the house is the nursery which is now being repurposed into the office.  We found a black/cream wallpaper that we had to have and had it hung above 'library panaling' that offsets it nicely.

Ugghhhhh! I am a horrible photographer.  I will get a better shot of this room when we have it finished as a new office so you can see the contrast of all the black and white.
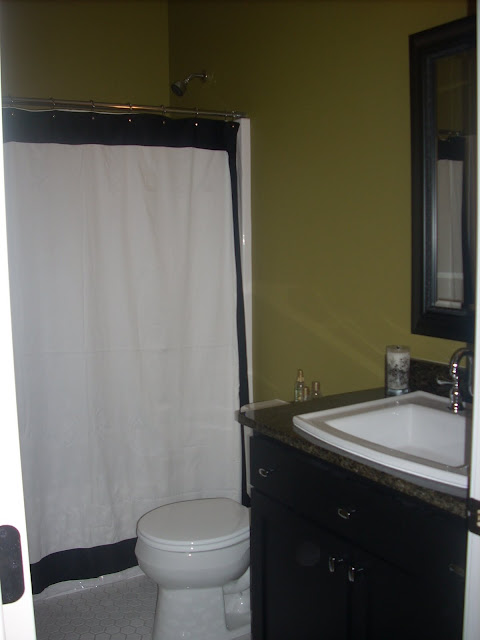
Here's the half bath right next door to the black and white room.

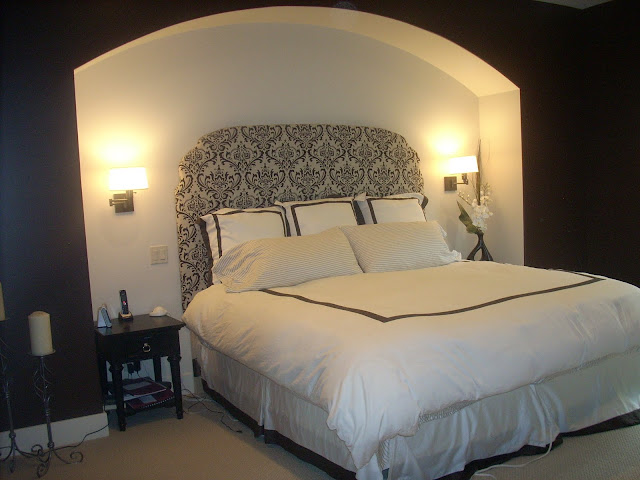
Initially we had trouble finding master bedroom bedding that wasn't cheap looking. We both knew we wanted it to feel like an elegant hotel room. Crisp and clean, but not overly formal.  Ken and I made the headboard out of plywood, batting and fabric that Lindsey had found.  We recessed the bed into the wall, (a change from the original floor plan) and added sconce lights. Hard to see the color, but it's a deep chocolate brown.
The walls in the master bath were covered in a light tan/grey linen looking wallpaper. Classic and simple.

The front entry needed something sturdy and stately looking.  Lindsey has a friend that owns a glass place and we had a mirror custom made.  Soooo huge and so great.  My girls would be dressing up in front of this all day long.  She was two girls as well.  They'll love this in a few years!


The basement includes a kitchenette, billiard area, half bath, full bath, playroom and three bedrooms, plus some fantastic storage areas.  Very fun, casual space to hang out with friends. It feels a little more contemporary down here with black cabinets, slate blue walls and furniture that's a little more modern.


Both girls have bedrooms in the lower level.  One we finished with the completion of the house, the other we're working on now. I'll post pictures of the completed room. We're doing some fun things with polka dots for that one. This is Sabrina's room and Lindsey's masterpiece.  I gave her instructions, and she ran with it.

Beautiful Sabrina modeling the room her talented mom painted! 

We knew we wanted something dramatic for the half wall above the board and batten look. We thought we'd do a headboard, but didn't need to after all!  The dresser I found at a garage sale and painted it hot pink with a dark stain over it. I think Lindsey probably spent more on the glass knobs then for the entire dresser, but it completes the girly look.

The girls' bath matches Sabrina's room and we'll make sure the colors of Annabel's room match the pink/green theme as well.

We chose this wallpaper because we loved the large print and the colors were so great.  She wanted something fun and different for the guest bath in the lower level. 


I wanted to show you the cool slate floor that we used.  Lindsey's husband, Brad poured the concrete countertops himself.  I should've gotten a better pic. of that. I thought they turned out great. 

This is the wall in the laundry room.  It looks like it could be wallpaper, but it's actually real stone tile.  We wrapped both walls with it, and Lindsey said she loves being in this room...not doing laundry, but enjoying the colors/decor. 

This wall is adacent to the laundry room in the back entry.  I wish every project was as fun and rewarding as this one was.  Not only did a get to meet an incredible new client and friend in Lindsey, I've had the opportunity to work with her mom and sister as well.  It really is all about the people.  Thanks Lindsey for sharing the better part of a year with me.  Lots of Mountain Dew and Diet Coke later, and I'm proud of what we accomplished together and the friendship that was forged. I think you rock! 

Comments...