I did manage to rev up the propane and kerosene heaters twice last week and get some much needed painting done. My assistant (always supportive hubby) willingly cut me some boards to make a truckload (well almost) of signs for my booth as well, so overall, I've been feeling pretty productive, along with helping you Chumps get started on some of your new year projects!
So far 2013 is shaping up to be a nice, easy-to-manage-trying-to-keep-my priorities-straight kind of year!
(I know, I know...it's early). Smile.
Thought this would be a fun twist on the planked style signs we've been making. For all of you Mom-Chumps...could it be, would it be, appropriate on your little boy's (or girls) bedroom wall? :)
This one below, never gets old.
Our motto at 125:
Another version:
These have become crowd favorites:
Great for upcoming Valentine's Day:
And will always be if you can continue to turn things like this $15 hunk of junk:
Into a new side table for my parlor:
Retrofitted with leftover pallet boards once again. Oh, the things you can do with them boards!
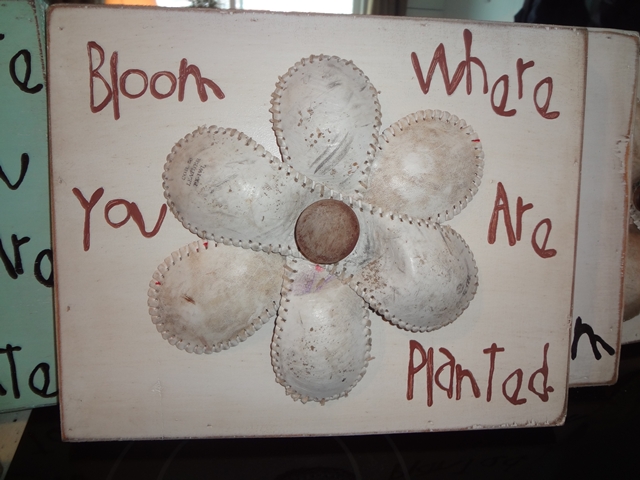
Remember the old baseball flowers that I made last spring? Thought I'd do a quick tutorial on putting them together. I started by using an exacto knife to cut through the seams of old vintage baseballs that I found at Burley Park antique show this summer. This is surprisingly easy to do and the leather just strips away like you're peeling an orange. It looks like this when you're done.
And this:
Paint a board or in my case, talk your husband into nailing together box type sign boards to give it a little more dimension: Here's an example of just a simple painted board, creamy white and distressed/aged with stain slightly:
Place the baseball strips (you'll need three pieces) from 2 balls into the shape of a flower and secure using a wooden knob. (Again, this is a job for my trusty assistant).
For the lettering, I printed a saying using a font size that would work for the size board that I had. This I traced onto the board using carbon paper.
Front side:
Back Side:
This side should be facing up...black side down as you trace.
Using a pen, outline the lettering by pressing gently and tracing.
Here's how it transfers:
Using a paint pen (you can get these at Hobby Lobby, Michael's or pretty much any craft store, color in your letters-and yes, it's important to color within the lines here! :)
Here's the finished product:
I'm bringing these and lots of signs to my booth tomorrow. Looking forward to more spring related projects to warm that space and your heart! :)


Post a Comment