It's that time of year again...time for sis and I to collectively coordinate a Christmas dessert table for Central Wesleyan's annual Women's dessert night.
Over 800 women assemble each year to listen to a fantastic speaker, fellowship with friends and munch on Pinterest perfect goodies.
The goal of the evening, above all else is to hear the good news of the coming savior, Jesus Christ.
All else, is just icing on the cake as they say, (pun intended). :)
This year's theme of 'Waiting' hit home for me.
Lots of us spend time waiting, don't we? I know I have in my own life. Waiting to graduate from high school and college, waiting to get married, waiting to have kids, waiting for the perfect career, waiting for success, waiting for circumstances to change, waiting for kid's to graduate, waiting for their weddings, waiting for retirement....
and the list goes on.
Instead of finding myself waiting this year, I want to find myself 'living'.
The only waiting I want to be aware of is the expectant waiting on my Savior. Waiting for His timing, His plan, His peace.
This seems like a more productive and fulfilling type of waiting.
Wanna join me?
Usually I"m pretty self-deprecating around this time of year, but I'm pretty proud of myself how low-key I'm keeping things. I haven't even started Christmas shopping and I'm not even stressed about it. I almost didn't put up a tree, but my daughter's insisted and did all the decorating themselves!
For the dessert night event, I knew in hosting a table for the past three years what was expected of us. Cherie would make the dessert and I would pick a theme or color scheme and decorate the table for eight. I didn't want/need to spend a lot and I wanted to keep it simple.
My weekly trip to Hobby Lobby resulted in the $5 purchase of this paper mache cone. I had a vision for wrapping it with white fringe to make a Christmas tree.
But on the advice of the Hobby Lobby cashier who saw this idea on Pinterest, she suggested I cover it with Christmas bulbs. So that's what I set out to do. (Grace wanted to help so badly).
I had this bag of extra plastic silver bulbs laying around,
...and with no plan in place, I started at the bottom to work my way to the top.
And I ran out about halfway up the tree! Again, proud of myself for not feeling super frustrated and buzzed out to the dollar store to see what I could find.
I ended up buying three boxes of very similar bulbs! I was only out three more dollars and 10 minutes of my time.
After glueing the bulbs to the top, my lovely design-minded daughter pointed out that she could still see the paper cone in between the bulbs.
Flying by the seat of my pants, as always, I rifled through one of my holiday totes to find this vintage white garland that I cut into strips, then poked through said holes with the end of a scissors.
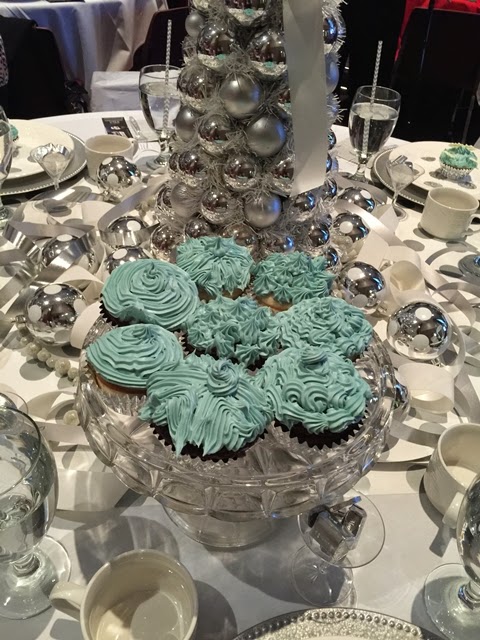
Here's the finished product that would become the centerpiece of the table.
I ended up finding polka dot wrapping paper at TJ Maxx and already had the silver/white polka dot plastic balls from Ikea several years ago.
I scattered those at the base of the tree and layered a strip of the wrapping paper as a table runner. I cut white and silver ribbon and laced that throughout and used white plastic tablecloth strips to use as chair slipcovers with bows.
Cherie and I ran out of time to find a decorative cupcake liner or plate, so I improvised and cut a circle from the wrapping to set the cupcake on.
Cherie made delicious chocolate and vanilla cupcakes with white chocolate drizzled on top in the shape of a snowflake. Shout out to Pinterest, once again!
Here are some of the other Christmas themed tables from that night. Such a festive way to kick of the holiday season.
Highlight of my night was our handsome server-none other than my nephew Cole.
Cousins-Cole & Kennedy
What a festive, fun night. I loved the large paper chains draped from the ceiling. Colors were a fun twist for the season as opposed to the traditional red and green.
Hope you found some inspiration for your holiday table. I'll be back here soon with some of the custom signs we've been working on.
In the meantime, while you're waiting....I pray that this advent season will be a time of hope and peace.
Lots of love to you Champs on this rainy Monday.
-c
Comments...

.JPG)